

I’ve had this idea for an Easter Basket Cake for a while now and on a recent trip to Target, some baskets in their Easter section caught my eye. I really liked that they had a diagonal weave and I immediately thought it would be a nice way to sort of modernize the traditional frosting basketweave. The concept is simple: an Easter basket made from cake and “filled” with traditional chocolate Easter bunnies, eggs, and grass. I had so much fun putting it all together and I’m happy to share my notes with you.

Notes:
- I baked two 8 inch round cakes and split each one into two, creating four layers then filled and stacked each one, using a cardboard cake base. I finished the sides with a crumb coat and frosted the top.
- I used fondant for the handle as well as the lower and upper edging on the basket. I prepared the handle a day in advance so it would have time to form and properly dry. (Next time I would use gum-tex powder kneaded into the fondant or gum paste on its own for the handle because it dries much harder and is more appropriate for this project). To make the handle, I rolled out the fondant, cut it to size, and laid it over a basket handle I had on hand from previous Easters. After it had dried enough to hold the arched shape, I transferred it to a parchment lined baking sheet and let it dry for 24 hours.
- I wanted a more current basketweave, so I used a Wilton #47 tip with the flat side facing up to create a smooth basket weave rather than a textured basketweave and I piped the weave diagonally rather than straight up and down. If you’re not into piping, you could frost the sides smooth and use a fork to create a basketweave by hand.
- I rolled out the fondant bottom and top edging and placed onto the cake, over the frosting on the bottom, covering the cardboard cake base and the cake, and along the top edge of the cake placing it so the edging sat a little bit above the cake top creating a more basket-like edging look, rather than aligned flat with the cake.
- Next, I topped the cake with Wilton green wafer shreds. You could also use green jimmies as a substitute.
- Then I added some chocolate Easter bunnies, baby chicks, and candy eggs. I used toothpicks placed on an angle on the backs of the bunnies to help them stand upright.
- To finish it off, I pushed the fondant handle into place by pushing down and into the cake on the left and the right.
This was such a fun project and I hope you’ll be inspired to give it a try!
Questions? Feel free to leave them in the comments below.


IT'S ME, SERENA!
I bounced through the first years of my life in a hippie gypsy wagon, hand-built by my father, wandering the back roads of the U.S., Canada and Mexico. My family eventually settled into a tiny cabin in the woods on property that was once inhabited by Native American Indians.
I spent my childhood days searching for arrowheads, teaching myself to sew on a treadle sewing machine and to bake in a wood-burning stove, with no running water, refrigeration, or electricity in our home. My family lived frugally and early on, inspired by my parent’s thriftiness and style, I gained a knack for thrifty creativity and turning ordinary objects into something useful. And I dreamed of the home I would create for my own family someday.
Now I’m married to my husband, Colin, and our children are all grown. After 24 years of producing The Farm Chicks Vintage & Handmade Fair, I'm spending time visiting other markets around the world. You can watch episodes of Serena Goes to Market here.
I share more about my life story from time to time, here on my blog. You can also find me on Instagram, and Facebook.
MORE POSTS LIKE THIS
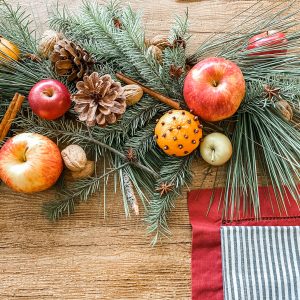
Natural Holiday Tablescape
Tablescapes add such a nice, warming touch to your home during the holidays. This year I decided to go with simple natural elements (greenery, fruit, and nuts) that are really pretty when gathered together. Best of all, it was really simple and inexpensive to create.I...

Festive Kitchen Christmas Tree
Decorating the kitchen with a small Christmas tree adds an extra bit of holiday cheer to your home. To continue my gingerbread theme this year, I made mini gingerbread houses and tiny stars for the ornaments and strung fresh cranberries as a garland. To finish it all...

How to Make a Fuller Garland
I love the tradition of placing a garland around the front door and I've discovered that I can make it much fuller by adding more elements to the garland once it's hung. I'll show you how! The first step is hanging the garland. I don't want to place any nail holes on...
COPYRIGHT 2026
THE FARM CHICKS
P.O. BOX 9866
SPOKANE, WA 99209


COPYRIGHT 2026
THE FARM CHICKS
P.O. BOX 9866
SPOKANE, WA 99209
Beautiful cake and so perfect for Easter?
Thanks so much! I hope you have a wonderful Easter. 🙂