A few years ago, my friend Tiffany and I visited New York City during the holidays. It’s such a beautiful time of the year to visit, with the charm of the urban tree lots, Union Square Holiday Market(which is a U.S. version of Europe’s Christmas markets and really great), and decorations all around. I especially love the old office buildings with their gilded names on their front doors and it clicked in a little inspiration for me. Each Christmas since, I’ve been painting a little gilded Christmas greeting on our pantry door for an extra bit of cheer. Here’s an easy step-by-step guide to show you how to make your own.

Here’s how to create your own gilded window. Start with printing out your message on thick cardstock paper. I like using a simple font that looks like what you’d see on the old office doors. Arial Bold works nicely.

Then cut out the letters with an X-acto knife, saving the center of the O’s and cutting those out next. (I use this handy Fiskar cutting mat from JoAnn‘s for all of the cutting).

Next, tape the stencil on the back side of the window. (The window is smooth on the back side of my pantry door. If it was rippled on both sides, it wouldn’t work because you need a smooth surface to work on.) Although I’ve used clear tape here, painter’s tape works best because it’s easily removed.

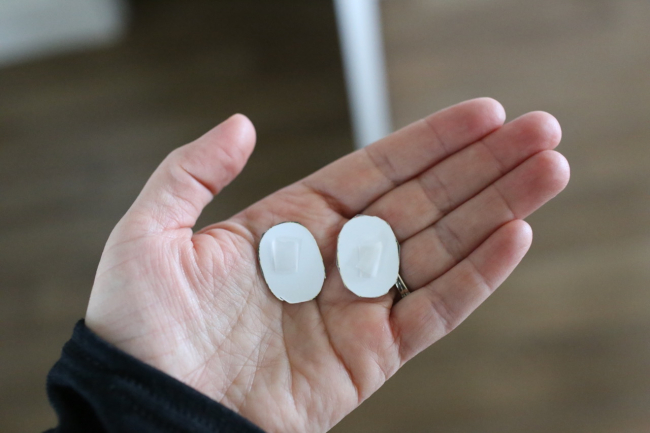
Next I add tape to the O Centers and stick them on the window:


Now it’s time to prepare the painting supplies:
- Paper Plate
- Metallic Gold Washable Craft Paint of your choice. (The key is using metallic paint, not just gold colored, to make it look gilded).
- Sponge Stenciling Tool

Squeeze a little bit of the paint on the plate and gently dab your sponge into the paint:

Then carefully dab dab dab dab the paint onto the cut-out openings of the stencil. You don’t want to swipe at any time because that will cause the paint to look smeared. Only straight dabs.

Continue until you have close to full coverage, checking the front of the window periodically to watch your progress. You don’t want to overdo it, and you don’t want complete coverage. By leaving slight gaps, it has a slightly worn, aged look:


Once you’re satisfied with your paint job, carefully remove your stencil and pull it straight back, making sure not to touch or smudge your paint if it’s still wet. Remove any center stencil pieces as well. (In my case, the O centers). It’s as easy as that!

And I like to add a wreath to finish it off. (I use removable Command hooks to hang the wreath).

To remove paint, use cotton balls and fingernail polish remover. (I like to use gel polish remover because it works quickly).

IT'S ME, SERENA!
In 2002, I was dreaming of creating a fun and happy little event to sell my vintage and handmade goods. In 2002, I held my first event in my neighbor's barn along with a handful of friends. The sale became wildly popular and began attracting visitors from across the country and recognition in national magazines. Today The Farm Chicks Vintage & Handmade Fair fills the Spokane County Fairgrounds and features hundreds of creatively and carefully curated spaces packed with vintage and handmade goods. Many describe it as a bucket list event, magical, inspirational, and the best event of its kind in the USA. I describe it as the best weekend of the year!
MORE POSTS LIKE THIS
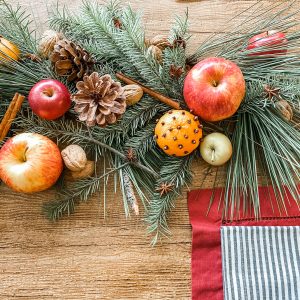
Natural Holiday Tablescape
Tablescapes add such a nice, warming touch to your home during the holidays. This year I decided to go with simple natural elements (greenery, fruit, and nuts) that are really pretty when gathered together. Best of all, it was really simple and inexpensive to create.I...

Festive Kitchen Christmas Tree
Decorating the kitchen with a small Christmas tree adds an extra bit of holiday cheer to your home. To continue my gingerbread theme this year, I made mini gingerbread houses and tiny stars for the ornaments and strung fresh cranberries as a garland. To finish it all...

How to Make a Fuller Garland
I love the tradition of placing a garland around the front door and I've discovered that I can make it much fuller by adding more elements to the garland once it's hung. I'll show you how! The first step is hanging the garland. I don't want to place any nail holes on...
COPYRIGHT 2024
THE FARM CHICKS
P.O. BOX 9866
SPOKANE, WA 99209

![]()
![]()
![]()
COPYRIGHT 2024
THE FARM CHICKS
P.O. BOX 9866
SPOKANE, WA 99209
![]()
![]()
![]()